Master 5 OS X Utilities in 5 Minutes
We’re sure many Mac users have seen the Utilities folder inside of the Applications folder and wondered what the applications contained inside can do. Maybe they can control the weather? Or maybe they give you super powers? The reality is bit less exciting, but still incredibly useful to even the newest Mac user.
In fact, they’re so useful that the folder even has its own shortcut key combination. You can easily get to the Utilities folder in any Finder window by pressing Command+Shift+U.
Activity Monitor
Have you ever wanted to monitor your processor, memory, disk or network usage, all in one fell swoop? Sure, there are already applications that do all of this, like iStat Menus, but why not use the one already installed on your system? Activity Monitor is built right into every Mac running OS X, and provides you with all of this information, and more, in one place. When you launch it, you can instantly see all of the processes that are running under the root, your account, or other user’s accounts.

Click any of the tabs at the bottom to instantly view the usage statistics, and a graph for the CPU, System Memory, Disk Activity, Disk Usage, and Network. Click any of the running processes and then the Inspect button at the top of the window to view more information about that process, such as the page ins, CPU usage time, and detailed overview of the memory usage for that specific process.
If you’ve ever had the misfortune of experiencing an application that stops dead in its tracks and refuses to continue running, you know how painful it can be. But with Activity Monitor, you can control all of this by clicking the unresponsive application in the list of processes and then selecting the Quit button at the top of the window. Activity Monitor will then force quit the application so you can get back to working.
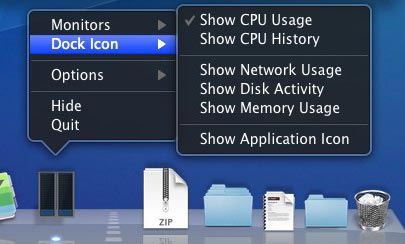
Another great feature about the Activity Monitor is that you can change the Dock icon so that it displays a graph of CPU history, CPU usage, network usage, disk activity, or memory usage. Just right-click on the icon in the Dock and select Dock Icon type you want to see. The Dock icon will then be updated to show a real-time graph as long as the Activity Monitor application remains opened.
Console
If you need to see when and why an application crashed, or any other important piece of information regarding your system, the Console app is a place to start. Console contains a running log of every task your computer encounters--from startup to shutdown. This is a great resource for diagnosing problems with your ailing Mac.
Since Mac OS X is continually logging information throughout your daily computing experience, you can see if someone logs onto your computer without your knowledge. This is great when your Mac is in a shared space and you suspect someone is using it without your permission.
Console also makes finding the correct log a simpler task with its ability to search all logs for precisely what you’re looking for.
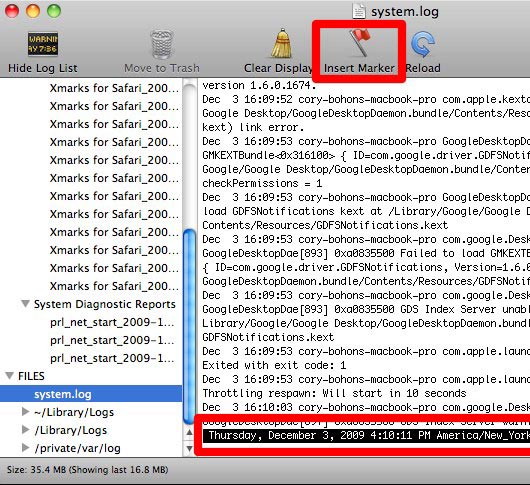
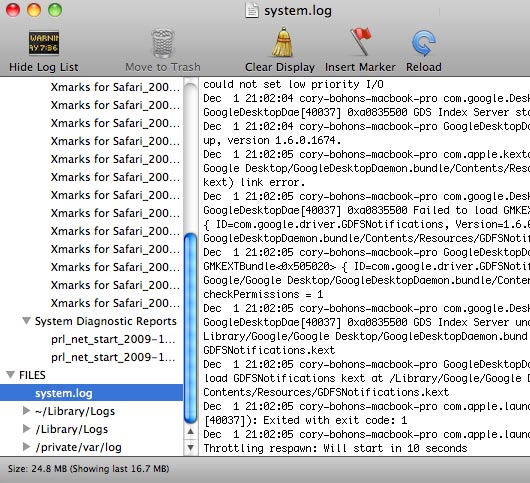
This resourceful app also displays the available log files on the left-hand side of the window. By clicking one of the logs, the contents will be viewed in the larger portion of the window. Every time the log file is updated the view will refresh to show the newest entry. If you want to stamp the log with the date and time for future reference, you can click the Insert Marker button at the top of the window. Click the Clear Display button to clear the log and start fresh.
If you are the type of person that loves logs and keeps Console.app open all the time, then you might benefit from a nice Preference that you can set for the application. Press Command+; to open the preferences, or go to Console > Preferences. Once there, you can set what happens when the log file is updated. The two available options are to have the Dock icon bounce when the file is updated, or also have the window come into focus and then disappear after a set period of time.
Disk Utility
Need to format a disk, create or change a partition, burn an ISO file, or create a disk image? Head to Disk Utlity, where it does all these things and so much more. This app can seem a bit disconcerting at first, but after nosing around for a few minutes, you’ll get the hang of all the power it holds.
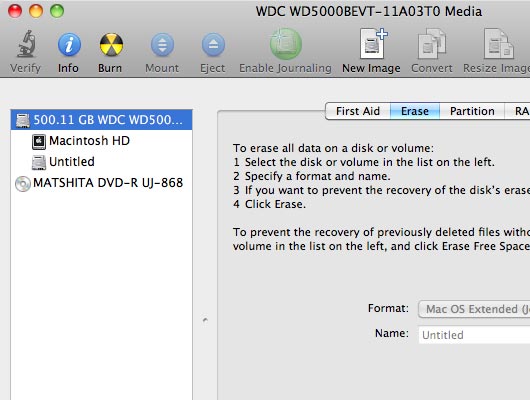
Disk Utility can be used to manage any internal or external disk connected to your Mac. When you launch it, the app displays all available disks on the left-hand side of the window. When you select a Disk or a partition (the items that appear underneath the drive), you’re given several options that are presented as tabs across the main section of the window. The options are First Aid, Erase, RAID, and Restore.
The First Aid tab allows you to verify and repair disk permissions, and verify and repair the disk. These options are helpful for Macs with login or file access issues. If your Mac is acting odd, one of the first things we recommend is to Repair Disk Permissions on the startup disk. It’s amazing how often that solves most issues.
The Erase tab allows you to erase all data on a disk or partition--this option is not available if the selected partition is the Startup Disk. You can select multiple formats for the erase, specify a name, and also select Security Options such Zero Out Data, 7-Pass Erase (which meets the US Department of Defense specifications for erasing magnetic media), and an amazing 35-Pass Erase that allows added security in erasing data from a disk. Of course, choosing a larger pass erase means that you’ll be waiting longer to erase your disk.
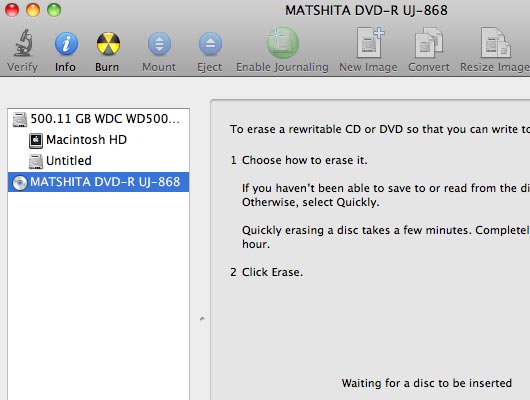
Rewritable optical disks are great until it’s time to clear them out. Insert an rewritable disc into your Mac’s drive, and select the device on the left-hand side. You’ll be presented with the options to erase the disc Quickly or Completely. Quickly will take a few minutes, while a complete erase can take up to an hour with a full disc. If you’re having problems with your rewritable disc, a complete erase is recommended.
Disk Utility also allows you to burn an ISO file to an optical disc easily. ISO files are used in place of snail mailing out physical disks. Users download the ISO file, then burn the image to a disc for installation. For example, If you were to download an installation ISO, in the Disk Utility application, click the Burn button at the top of the window, select your downloaded ISO file, then click Burn and you’ll have a burned disc in a matter of minutes depending on how much data needs to be burned and the speed of your optical drive.
Disk Utility is a very versatile application for managing disks on your Mac. In addition to managing hard drives, you can use Disk Utility to format and erase USB thumbdrives, and almost any other drive you can connect to your Mac.
Network Utility
Network administrators and geeks alike will appreciate Network Utility. This application provides a simple, streamlined, graphical user interface for network services that typically run in a command line interface.
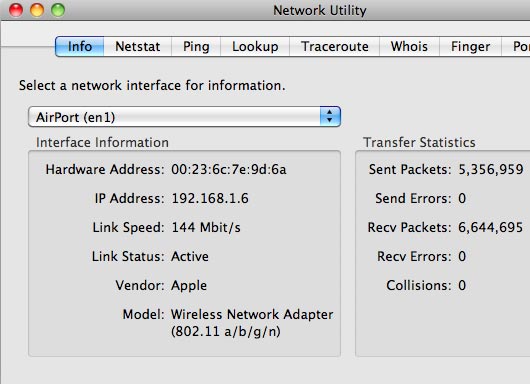
There are eight tabs that run across the top of this application, allowing easy access to Info about your NICs (Network Interface Cards), NetStat, Ping, Lookup, Traceroute, Whois, Finger, and Port Scan.
The Info tab will allow you to see information about different NICs (Network Interface Cards) connected to your computer. Use the drop-down menu to select, for instance, your AirPort card. The Hardware or MAC (Medium Access Control) Address, local IP address, Link Speed/Status, Vendor, and Model will be listed for your viewing pleasure. You will also be able to see how many Packets have been sent and received, as well as how many send/receive errors have occurred. You can also see how many packet collisions have happened on your LAN (Local Area Network).
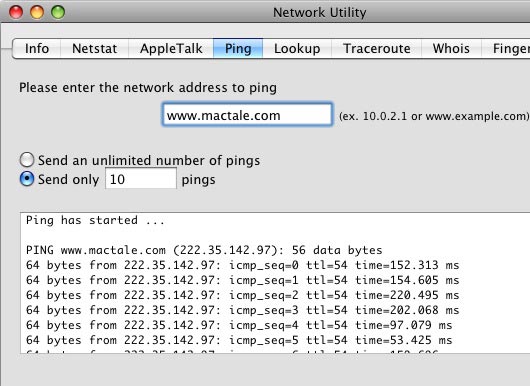
For network admins, or for the average Mac user trying to troubleshoot a networking issue, the Network Utility application is incredibly useful. In addition to giving you a range of tasks that previously had to be implemented in the command line or with third-party apps, you can start one task in one tab and move to another tab to start another without stopping the first task.
ColorSync Utility
ColorSync allows you to set, update, and create color profiles for different monitors. This task is mostly used in the creative market, where graphic designers need to ensure that the colors represented on their monitors are as true as possible.
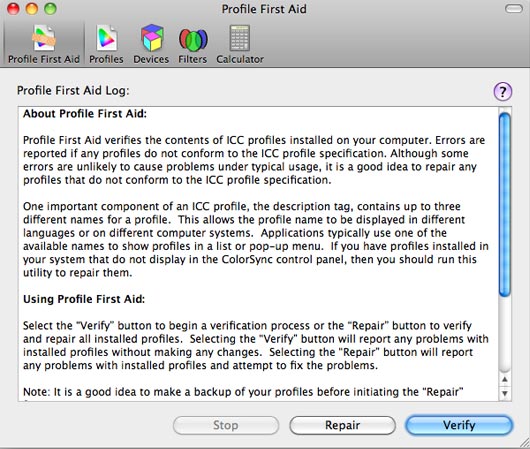
There are five buttons that run across the top of the window that provide the different tasks: Profile First Aid, Profiles, Devices, Filters, and Calculator.
Profile First Aid allows you to verify and repair your ColorSync color profiles so they match the specifications set for in the International Color Consortium. The Profiles tab allows you to see all of the ColorSync profiles that are currently installed on your computer. By Clicking on a specific color profile you can see the Name, Path to the .icc file, Class, Space, PCS, Version, Date of Creation, Size, and a Lab Plot.
The Devices tab allows you to see all of the ColorSync devices that are currently registered. When you click on a specific device, you’ll see the ID number, Factory set color profile, current color profile, and the scope of the color profile attached to the device (normally affecting any user of the machine). The Filters tab lets you see and modify existing Quartz composer PDF filters so you can use them to customize color in a file. These PDF filters are available for the rest of the operating system to use.

The Calculator tab lets you easily convert between RGB, HSV, HLS, Lab, Luv, XYZ, Yxy, Gray, and CMYK color values. The Calculator function also copies some of the functionality of the DigitalColor Meter (located in the Utilities folder) by allowing you to click the magnifier glass, pick a color anywhere on the screen, and see the value that corresponds to that color. This, unfortunately, doesn’t allow you to get Hex values for colors, which DigitalColor Meter does.
We hope that this how-to has allowed you to gain a better understanding of these five Mac OS X Utilities, and how they can better serve your daily computing experience.