Auto-Add Songs to iTunes from Any Computer Anywhere
Download a song on your laptop, and add it to the big iTunes library on your desktop Mac--even if you’re away from home. The Home Sharing feature in iTunes 9 lets you share music between computers right within iTunes, but it has a bunch of limitations. Both machines need to be on one network, and the only automatic transfers are new iTunes Store purchases--regular old CD rips and non-iTunes downloads can be dragged manually from one computer to another.
But iTunes 9 also added the Automatically Add To iTunes folder to your iTunes Media folder. Any iTunes-compatible file dropped in here is, like the sign says, automatically added to your iTunes library. Just drop it in there and poof, it’s gone. But check in iTunes. It’s there.
Pretty cool, but better yet, we can add things to that folder from other computers, both on the local network and elsewhere. So if you have a main iTunes library stored on a Mac mini in your entertainment center, you can add tracks to it from any other computer you use, from an iMac in the den, a laptop in the backyard, or even your Mac or PC at work.
The Easy Way: Over a Local Network
1. The Connection
If both computers are on one network, this is a piece of cake. We’ll call the computer with the big iTunes library the Home Mac, and the one you’ll be using to add tracks to it the Away Mac.
On the Home Mac, open System Preferences > Sharing, and turn File Sharing on. You don’t have to do anything else to the Sharing settings.
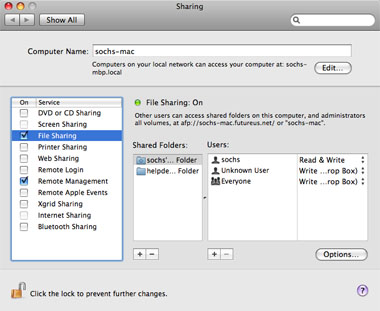
Turn on File Sharing for your Home Mac.
On the Away Mac, open a Finder window and look for your Home Mac in the Shared section of the sidebar. Click it to start the connection, then click the Connect As button near the top right. Log in with the username and password you use on the Home Mac.
2. Alias Away
Now that you’re logged in to the Home Mac from the Away Mac, navigate to its ~/Music/iTunes/iTunes Media/Automatically Add To iTunes folder. (Sometimes the iTunes Media folder is still called the iTunes Music folder, a remnant from iTunes 8.) Click the Automatically Add To iTunes folder once to select it, then press Command-L to make an alias, or go to File > Make Alias.
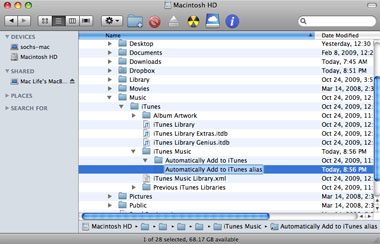
rename this new alias something like drop into Main iTunes.
3. Drag and Drop
Rename the alias folder whatever you like, and drag it out of that Finder window to wherever you like on the Away Mac. Now when both computers are on the same network, you can drop songs or videos onto that alias folder on your Away Mac, which sends them to the original Automatically Add To iTunes folder on your Home Mac. If the Away Mac isn’t connected to the Home Mac, it’ll ask you to log in the first time. Add the password to the Keychain, and it’ll log you in without asking from there on out.
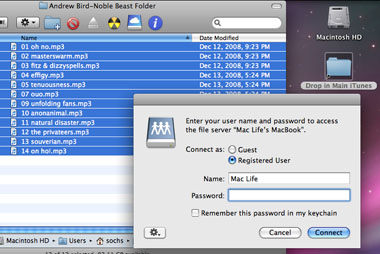
You need to log in as a user of the other computer.
The Trickier Way: Over the Internet
1. Get Dropbox
We can accomplish the same thing over the Internet, but it’ll take a little more setup. First, get a Dropbox account (www.getdropbox.com), free up to 2GB, which ought to be enough. Download and install the free application, which puts a Dropbox folder in your Finder window’s sidebar. Put the application on all your computers, but tie them all to the same Dropbox account.
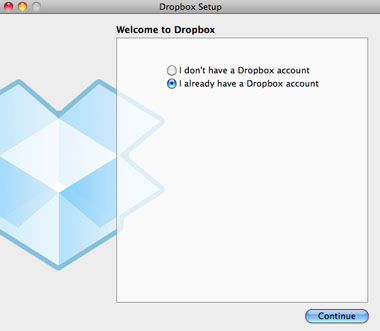
When you add Dropbox to more than one computer, tell the app you already have an account.
2. Sync-a-Song
Make a new folder inside your Dropbox folder called Add To Main iTunes. When you drop a file in here, Dropbox will sync it to its cloud service (assuming you’re online), and you’ll see the changes update nearly instantaneously on all the computers that you installed Dropbox on. This way, you can put songs and videos in that Add To Main iTunes folder on any of your Away Macs (or even an Away PC), running on any network, and the files will be synced to your Home Mac’s Dropbox.
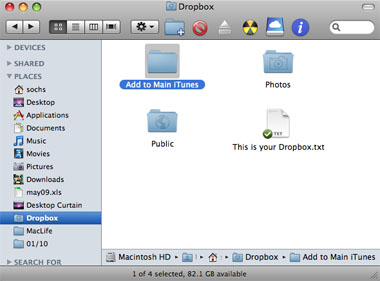
Create a folder inside your Dropbox folder where you’ll drop media files.
3. Get Hazel
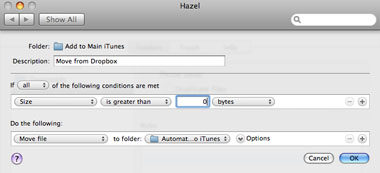
But to get the songs from your Dropbox to iTunes, you need to install Hazel ($21.95, www.noodlesoft.com) on the Home Mac. Hazel watches a folder and performs actions based on triggers. We’re going to set it up to watch the Add To Main iTunes folder inside your Dropbox, and move anything it finds there to the Automatically Add To iTunes Folder inside your ~/Music/iTunes/iTunes Media folder, so it gets put in iTunes. Copy the settings in our screenshot and try it out--works like a charm.
