How to Back Up Your Entire Network
Time Machine can back up your Mac. But ChronoSync and ChronoAgent can back up all your Macs.
Time Machine is great for backing up one or two Macs, but when backing up a larger network of Macs, it’s better to use a more sophisticated backup program that gives you more control over the process. Your best bet for powerful network backup software is the combination of ChronoSync and ChronoAgent (www.econtechnologies.com). Together, these applications give you almost unlimited flexibility for scheduling backups, backing up multiple sources to multiple destinations, creating bootable backups, and more. You’ll also get enterprise-level features like central management of your backups from a single Mac, email notification of errors, and detailed backup logs. These instructions will help you set up one “server” Mac to back up any number of “client” Mac home folders to an external hard drive attached to the server Mac. (Note that we’re loosely using the term “server” to refer to the main Mac that controls your backups, and “client” to refer to any of the other Macs on your network. You don’t actually need to have a real server running Mac OS X Server.)
What You Need:
- Multiple Macs on a LAN or WAN network, all running Mac OS 10.3 or later
- One or more external hard drives, with enough space to hold all of your Macs’ home folders
- One copy of ChronoSync for your server Mac ($40, www.econtechnologies.com)
- One copy of ChronoAgent for each one of your client Macs ($10 per Mac with volume discounts available, www.econtechnologies.com)
1. Install ’Em All

Once you’ve filled out all the fields (you can leave port number alone), click the Start button to activate ChronoAgent on each client’s Mac.
Install ChronoAgent on each one of your client Macs. Then go into System Preferences > ChronoAgent and set a name, username, and password for each client. Click Start to activate ChronoAgent. (This is the last time you’ll touch your client Macs; the rest of the instructions are all done on the server Mac.)
2. Make the Connections
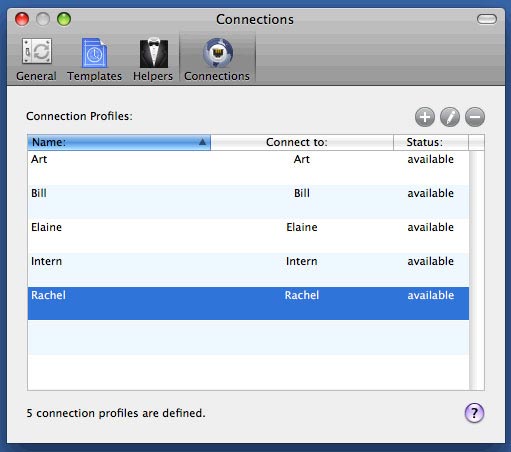
We’ve successfully created connections for five client Macs. You can even connect to the clients over the internet by IP address!
Install ChronoSync on the server Mac and launch it. Then go to ChronoSync > Preferences, click the Connections button, and click the plus sign to create a connection to each of the client Macs that you configured in Step 1.
3. Mount the Iron
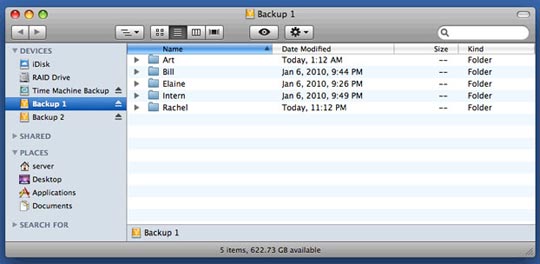
One folder for each client Mac, nice and neat.
Connect your external hard drive to your server Mac. In the Finder, create one folder for each one of your client Macs on this external hard drive. Don’t skip this important step, or ChronoSync might overwrite one client’s files with another client’s files during a backup. And that would suck.
4. Sync Up
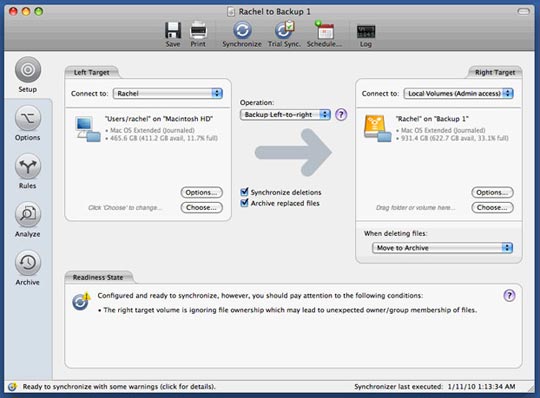
This synchronizer document will back up Rachel’s home folder to the Rachel folder on our external hard drive.
In ChronoSync, choose File > New > Synchronizer to create a new backup document, aka “synchronizer document.” For the left target, choose one of your client machines and select its home folder. In the middle, choose “Backup Left-to-right” (to send the backups in one direction), “Synchronize deletions” (so if a file is deleted from the client, it’s deleted from the backup), and “Archived replaced files” (to save all versions). For the right target, choose the folder you created on the external hard drive for that client. Also choose the option that says, “When deleting files, move to archive,” so you have a chance to restore deleted files before they’re gone forever.
5. More Options
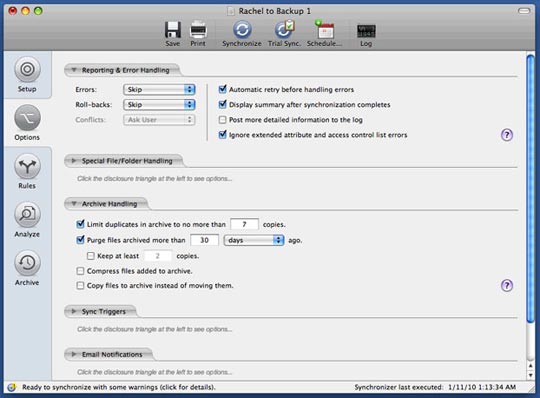
We set Archive Handling to 7 copies, and we’re purging deleted files after 30 days.
Click the Options tab. Under Reporting & Error Handling, select Skip for the Errors and Roll-backs dropdown menus. This will let your backup continue without pausing for errors whether you’re there minding the store or not. Under Archive Handling, set the maximum number of versions that you want in your archive. If you set this to 7, that means that you’ll be able to restore the seven most recent versions of any backed-up file. We typically set “Purge files archived more than” to 30 days, which means that any files deleted from a client machine over 30 days ago will be removed from the backup drive too. This can help prevent your hard drive from filling up sooner than expected.
6. Name It Well
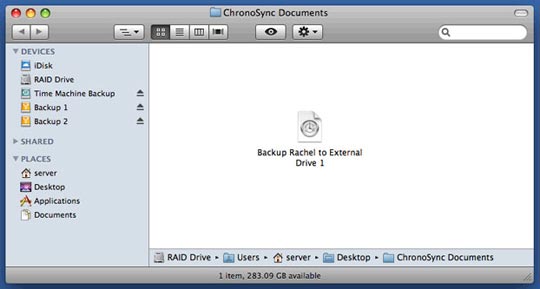
Our descriptively named synchronizer document, as seen in the Finder.
Save this document in a new folder called ChronoSync Documents, which will hold all of your synchronizer documents. Name the document something descriptive that mentions the left and right targets. For example, “Backup Rachel to External Drive 1.”
7. Again!
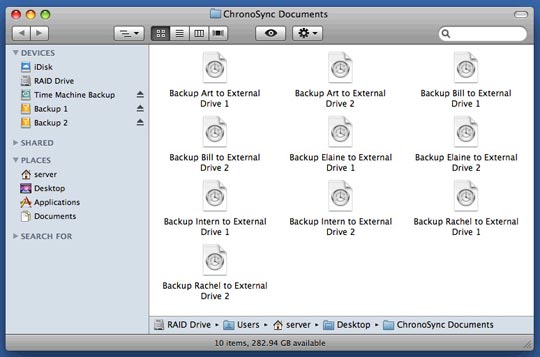
We have five clients, each backing up to two backup drives, for a total of 10 synchronizer documents.
Repeat Steps 4 through 6 for each unique combination of left target (additional clients) and right target (multiple external hard drives). When you’re done, you will have a folder filled with all of your synchronizer documents. Now it’s time to schedule them.
8. The Container Store
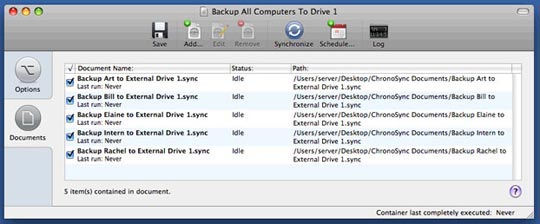
We dragged in all of our synchronizer documents that back up to External Drive 1.
Go back into ChronoSync and choose File > New > Container to create a container document that groups together multiple backup documents as one group for easy scheduling. Click the Documents tab and drag in your synchronizer documents (from the Finder) that you would like to schedule together as one group. Save the container document with a descriptive name, such as “Backup All Computers To Drive 1.”
9. Be Bossy
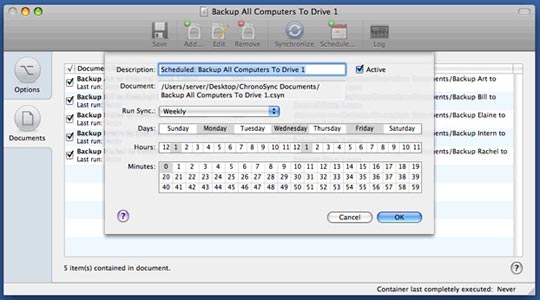
You can schedule your backups to the minute.
Click the Schedule button and choose the days and times you want this group of synchronizer documents to run. You can select multiple days and times by holding down the Command key when clicking. We set the container shown in the screenshot to back up on Mondays, Wednesdays, and Fridays at 1:00 a.m. and 1:00 p.m.
10. Back Up Like Nobody’s Watching
We recommend these options for your containers.
Click the Options tab. Under Reporting & Error Handling, check the first 3 boxes so that the operation will continue without your interaction. Configure the options under Email Notifications to have ChronoSync notify you of any errors in your backups. When you’re all set, save your container again.
11. Wake Up to Back Up

These settings should set you up right.
In ChronoSync > Preferences, check the boxes for “Use background scheduler” and “Wake system to synchronize.” That way your backups will happen even if ChronoSync isn’t running or your Mac is asleep. We set the “Send emails via” dropdown to Direct Messaging, which lets ChronoSync email us directly without needing to launch an email client. And uncheck the box for “Create new document on activate” since you’ve already created all the documents that you need.
12. Relax
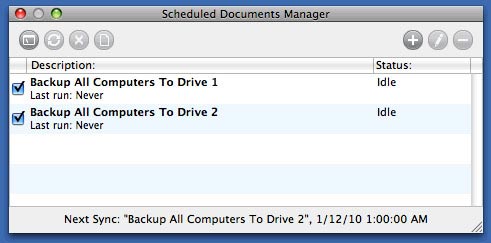
Looks like our next backup happens at 1:00 a.m. onto Backup Drive #2.
You’re finished! If you’d like, you can choose Window > Scheduled Documents Manager to monitor all of the schedules that you’ve created for ChronoSync. Our screenshot shows two schedules, but remember that in Step 8 and 9, we used those scheduled containers to back up five client Macs.