How To Create a Secure Wi-Fi Network
You wouldn’t give a stranger complete access to your important, personal information, so why wouldn’t you secure your wireless home network? With an open network, you are setting yourself up for a potential attack, be it packet sniffing, or network sharing snooping. You’re not entirely secure until you enable wireless encryption.
If you’re worried about making sure your information is safe on your home network, follow along as we show you how easy it can be to secure your wireless network and monitor it for potential unauthorized users. By doing this, you’re ensuring security and peace of mind when it comes to computers connected to your network.
Learning the Lingo
When it comes to wireless encryption, there’s a lot of lingo. So, lets explain what some of the wordage is and get it out of the way so we can begin encrypting the wireless network.
WEP (Wired Equivalent Privacy)WEP was one of the first methods of protecting your wireless network from eavesdropping, and it was the best until WPA technology was released. WEP uses a hexadecimal key to encrypt the network and is no longer recommended for wireless encryption because of weak algorithms that can lead to the encryption scheme being easily broken.
WPA/WPA2 (Wi-Fi Protected Access)WPA and WPA2 are newer technologies used to secure a wireless network. This method was developed after vulnerabilities were discovered in the WEP encryption scheme. While there are still some weaknesses associated with WPA and WPA2, these encryption methods are still considered the most secure way of protecting a wireless network.
Key/Passphrase/PasswordA key or passphrase refers to the code by which you must enter to gain access to a protected network. When connecting to a protected network you will often be asked to provide a key or passphrase, unless you’ve stored this information in a password manager like Keychain Access.
MAC Address (Media Access Control Address)A MAC Address (a.k.a. “Hardware Address”) is not something unique to a Macintosh (as the name might imply to some), but it is something unique to each computer. The networking cards in your computer (Ethernet, 802.11 wireless, Bluetooth, etc.) each have their own unique identifier called a MAC Address. This address consists of 6 groups of 2 hexadecimal digits (looking something like this: 01:23:45:67:89:ab). This address identifies the computer on the network and even the manufacturer of the network card. Since this address is unique to the computer, by blocking a MAC Address from the router you are essentially blocking the computer from your network. The only way to get a new MAC Address is by replacing the network card in a computer.
IP (Internet Protocol) AddressThe IP Address is a dotted quad address (that looks something like: 192.168.1.1) usually automatically assigned upon connection to a router. This address can be used to connect to the computer through the network. Unlike the MAC Address, the IP Address changes when connecting to different routers, and can even change due to expiration when connected to the same router.
Securing Your Wireless Network
There are many different routers that have different control panels. Because of this, your settings for wireless security may be in a different location than what we show you. Refer to the documentation for your particular router to find out where the security settings are located.
We’re going to show you how to implement security settings for both an Apple AirPort router and a Netgear router.
Enabling Wireless Security on an Apple AirPort Router
1. Open the AirPort Utility located in /Applications/Utilities.
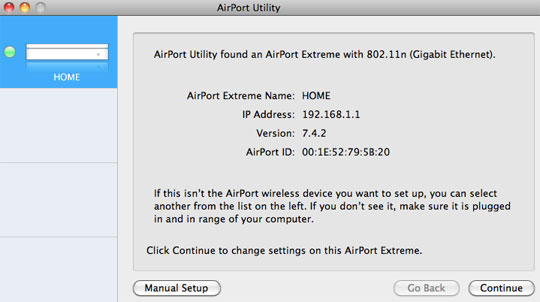
2. Click the Manual Setup button from the main screen, then type in your password if asked in order to authenticate
3. Select AirPort > Wireless

4. About half way down the panel, you will notice a drop-down menu labeled Wireless Security. From here you can select the type of security you want to implement. You can choose from WEP, WPA/WPA2 Personal, WPA2 Personal, WPA/WPA2 Enterprise, and WPA2 Enterprise.
5. Depending on the wireless clients that will be connecting to the router, you may need to use WEP; however, if your devices support WPA, we suggest using WPA/WPA2 for the best of security and compatibility.
6. Type in an authentication password in the box labeled Wireless Password. This password can be up to 64 characters long, and we recommend making it at least 25 characters long for security. When you’re done typing it, retype it in the box labeled Verify Password.
Optionally, you can have your computer remember the password by checking the box labeled "Remember this password in my keychain."
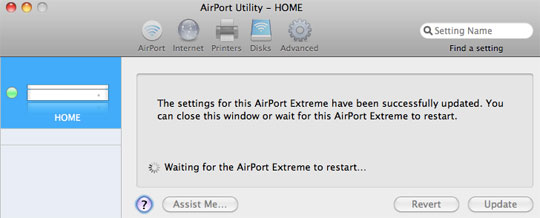
7. When you’re done entering your password, click the Update button in the lower right-hand corner of the AirPort Utility window. This will restart your AirPort router and your new security settings will be in effect.
Enabling Wireless Security on a Netgear Router
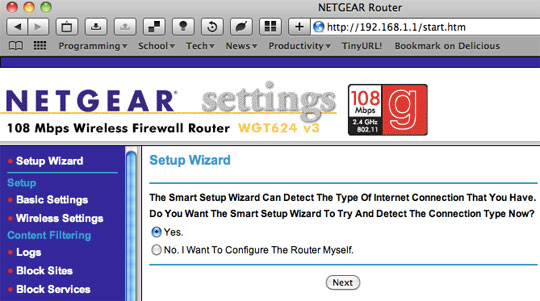
1. Open the router management page; in this instance, this page is accessed by opening 192.168.1.1 in your web browser. Your router may have different settings.
Your browser will ask for the username and password to open the router management page; by default on some routers, the username is “admin” and the password is “password.” You can usually check the manual that comes with your router for this particular information.
2. Once in the router management panel, click on Wireless Settings under Setup.
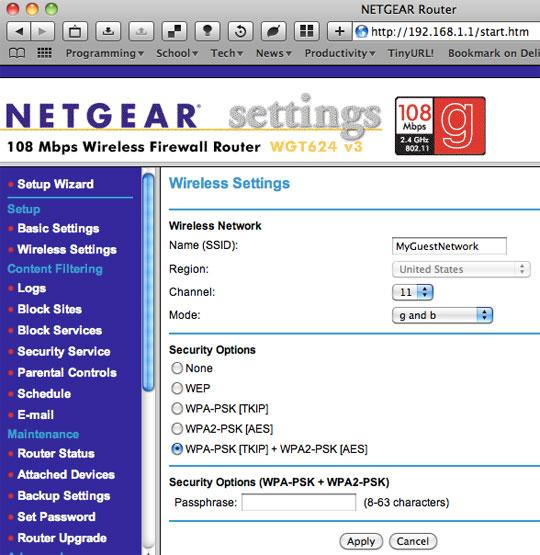
3. This area of the router management software will allow you to setup various network security settings. Under the Security Options area, we recommend selecting WPA-PSK + WPA2-PSK for the best of security and compatibility with various devices. If you’re using devices that can only operate with WEP, you should select that.
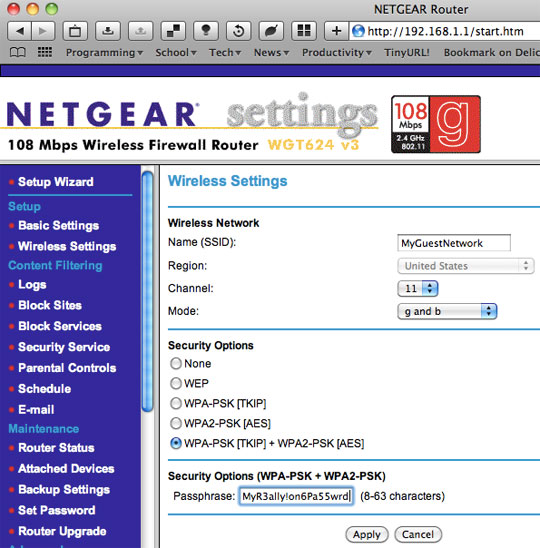
4. Type in your passphrase from the box that appears in the Security Options section.
5. When you are done click the Apply button and your security options will be saved.
Connecting to a Secure Network
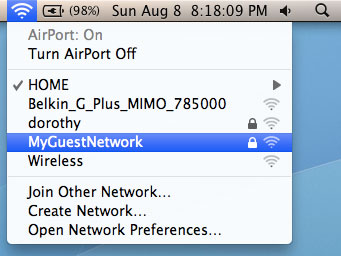
When you implement your security settings, your router will ask for your password when you connect to it. Just as you would with any network, select your network from the AirPort menu bar section on your Mac.
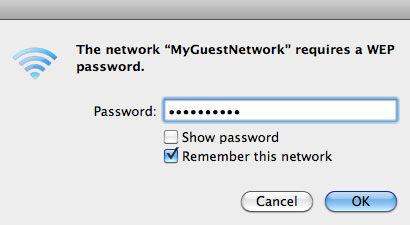
When you do this for the first time after securing your network, your Mac will ask for the WPA or WEP wireless network password. Enter your password in the box and select “Remember this network” to automatically connect to your network whenever your Mac is in range.
Monitoring Your Network for Unauthorized Computers
Most modern routers give you the ability to look at logs in order to determine if your wireless network is being used by someone who is not authorized. Many routers will also give you the ability to block unauthorized computers by its MAC Address. The MAC Address of computers will be logged when the devices connect to the wireless router.
Monitoring Logs and Restricting Access on an AirPort Router
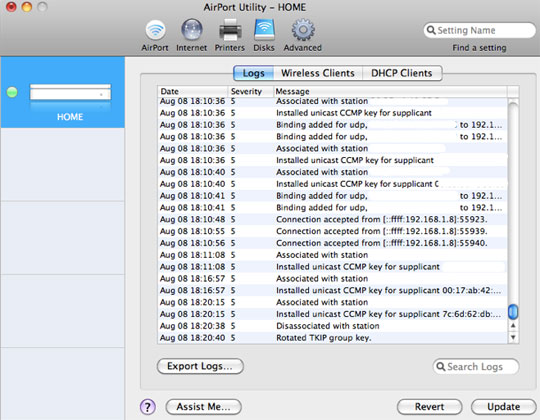
To check the logs on an AirPort router for unauthorized devices, open the AirPort Utility and click Manual Setup. After authenticating with your AirPort password, select Advanced > Logs and Statistics.
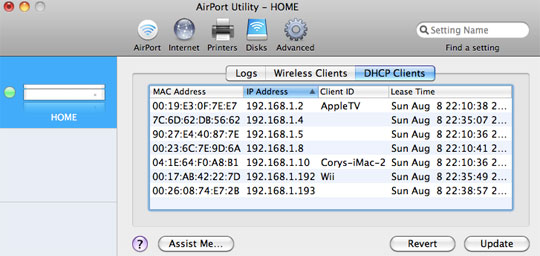
You should now see the logs. Each time a computer connects, its IP Address and MAC Address are recorded in this area, but you can also see the currently connected computers by selecting Advanced > Logs and Statistics > DHCP Clients.
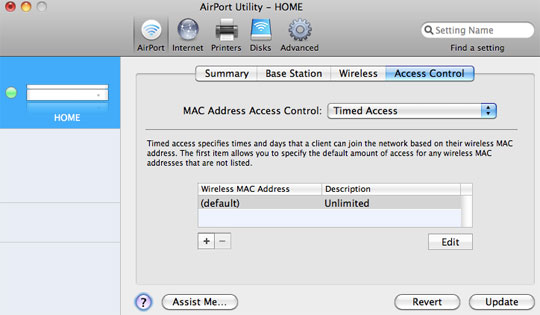
If you see an unauthorized computer, you can block it by getting the MAC Address from the logs or the currently connected clients. Then open AirPort > Access Control and select “Timed Access” from the drop-down menu labeled MAC Address Access Control.
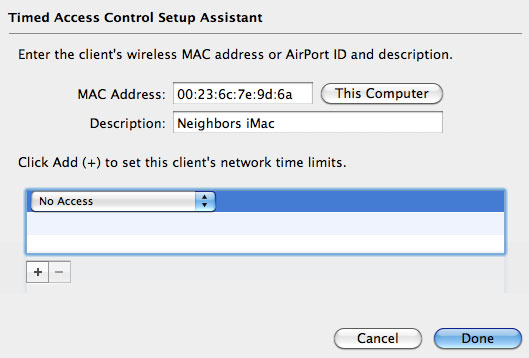
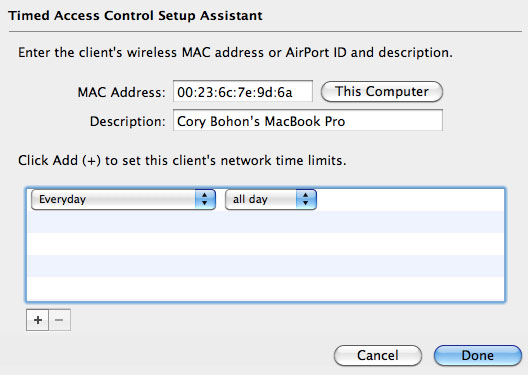
From the Timed Access view, click the plus button to add a new blocked client. In the resulting drop-down panel, type in the MAC Address you found in the logs, add a description, then in the time limit area set "Everyday" to “No Access.” Select Done when you are finished configuring this window.
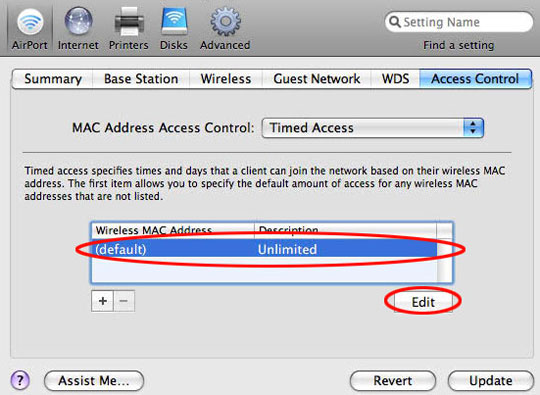
You can also change this section to only allow approved computers by selecting the (default) Wireless MAC Address and clicking the edit button.
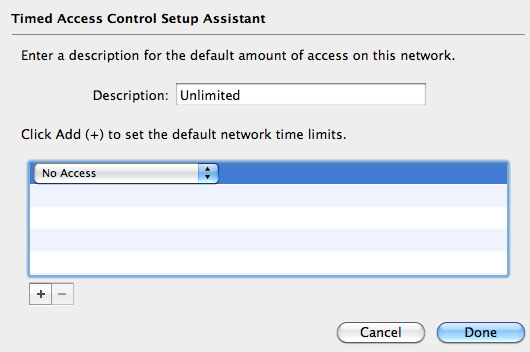
Under the network time limit, select "No Access," then click Done. Then add the MAC addresses of the computers you with to use on the network using the plus button, and selecting "Everyday - All Day" from the time limit.
When you are finished adding computers to the MAC Address control list, press the Update button in the lower right-hand corner of the AirPort Utility window to save the settings and restart the router. Now, the blocked computers will no longer have access to your wireless network, even if they have the WPA password we set earlier.
Monitoring Logs and Restricting Access on a Netgear Router
Managing logs on the Netgear router is easier. Just select Logs from underneath the Content Filtering area of the control panel. You can also see the MAC/IP Addresses of the currently connected devices by clicking Attached Devices under Maintenance.
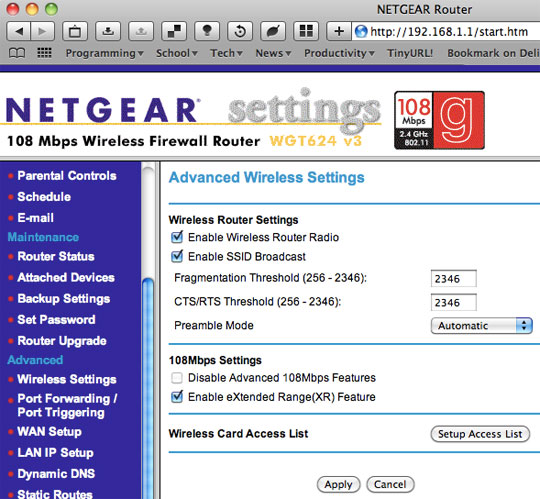
To setup a Wireless Access List, click the Setup Access List button from the Wireless Settings link under the Advanced list.
From the resulting page, select click the box labeled “Turn Access Control On,” then click Apply. After the router updates the settings, you will be returned to the same access control list page.

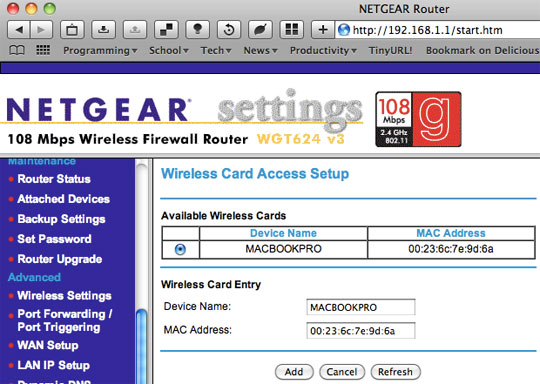
This list works by adding the allowed devices. To add an allowed MAC Address, click the add button. The add page will ask for a Device Name and a MAC Address to add. You can get the MAC address for the connected devices from the Attached Devices list.
Author: Cory Bohon