The Complete Guide for Child-Proofing Your Mac

Kids and computers go together like peanut butter and jelly. Or like crayons and white-painted walls… My point is that kids start using computers earlier and earlier, and many of them become very adept and quite precocious at an extremely young age.
There are significant dangers out there: the online world is a new place to be concerned about what your kids are up to, and we’ve all heard too many stories already of youngsters getting into trouble online. Happily, your Mac comes with a few bits of protection built in, and there are some good applications available to help you extend those controls.
I’m going to talk you through three different ways that you can go about putting in place better online safety precautions: via OS X’s built-in Parental Controls, with an external application, and by getting to the heart of how your computer interfaces with the internet, by taking control of your DNS settings.
Using Parental Controls
The first thing to say is that you’re well-served by creating separate user accounts for your children – maybe one for each if you have a few (that could reduce some fighting, I expect!), but certainly at least one account that’s separate from yours.
Once you’ve done this, OS X makes it easy to apply Parental Controls that allow you to decide what site each account has access to, how long the computer can be used each day, and a few other things.
Setting up a New Account
To begin, click on the Apple icon in the menubar, select ‘System Preferences’, and then click on ‘Accounts’.
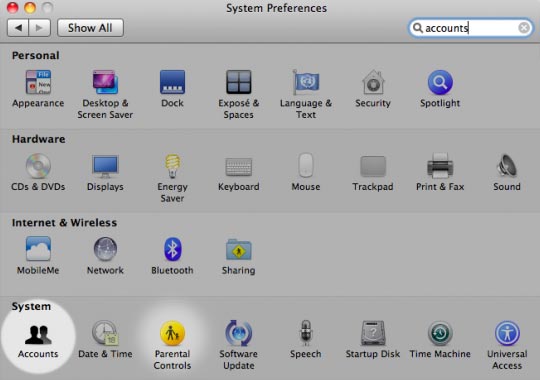
Accounts
You’ll then need to click the lock at bottom left to make changes, which will bring up an authentication prompt for you to enter a system administrator’s password.

Setting a Password
It’s important that you keep this password a secret from your kids, because with it they – or anyone with access to your machine – could wreak very real havoc, since they would have complete access to all your settings and data.
Many people advise creating a Standard account even for yourself, to minimise the access that’s allowed to important settings and protect you from accidentally doing damage – as well as to protect your computer from others that might do malicious damage.
Once you’ve authenticated, you can click on the + sign below the list of existing accounts to add a new one. A panel slides down, where you enter details for the new account. You set a username, an account name, password, and – crucially for this article – the account type. What you want to do is select ‘Managed with Parental Controls’.
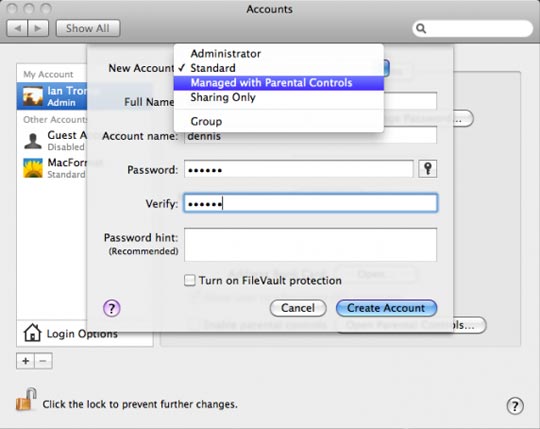
Managed with Parental Controls
Changing Access and Controls
Once you’ve created the new account with these settings, when you select it from the list of accounts, you’ll see that there’s a button right there to ‘Open Parental Controls…’. Click this button, and you’ll be taken to the Preference Pane that gives you control over these settings:
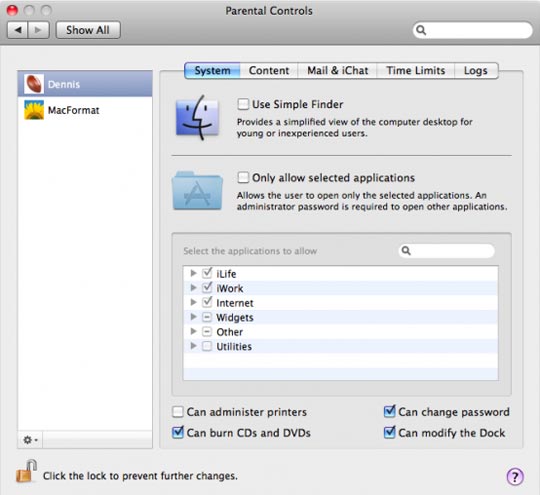
Parental Controls
The options here are quite obvious, but provide some fundamental protection. You can choose to have the account use a simplified version of the Finder, and restrict which applications are visible to this user – even to the extent of blocking access to particular Dashboard Widgets.
More importantly, you might want to limit their access to some of the system utilities, or you might go so far as turning off internet access altogether by disallowing all browsers. That might be a little mean, especially when you can use some of the other Parental Control settings to limit the material they can access.
The “Content” tab allows you to restrict what your kids can see on the internet and on the computer (by hiding ‘profanity’ in the Dictionary – that’s going to be Apple’s call on what’s profane and what’s not, since you have no specific control of what’s visible and what’s hidden).
Limiting Internet Access and Use
For limiting internet access, you can either select ‘Try to limit access to adult websites automatically’ (the ‘Try’ here is significant and acknowledges how hard this task is), or you can customise access restrictions yourself to always allow or disallow specific sites, or limit which sites are accessible by entering a list of your own choosing.
The Mail and iChat tab allows you to set restrictions on who your kids can chat with online, or send and receive email from. A nice feature is the ability to set an address for permission requests to be sent to, so that you can know when there’s somebody new in your child’s online life, and check out whether you’re happy for them to be in contact with that person.
Limiting General Computer Use
The next tab lets you set time limits for computer use:
<7550" >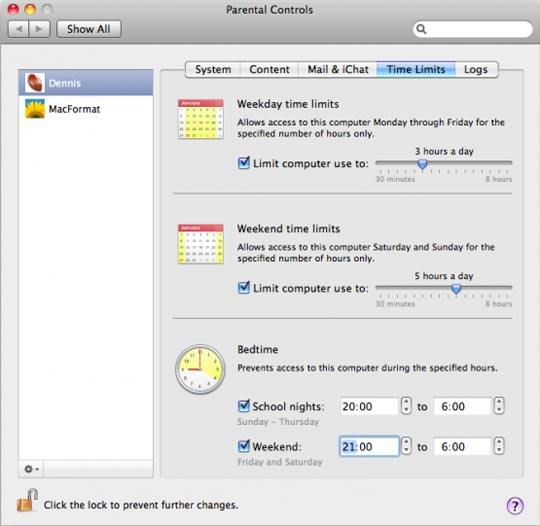
Setting Time Limits
Apple’s approach here is quite broad-brush: you can specify the number of hours per day, with separate settings for weekdays and weekends, and you can set bed times, again with an option for a different settings for Monday to Friday and weekends.
These settings work like a time-allowance, and when it’s gone, it’s gone. It’s not a subtle setup, and doesn’t give you control over specific times – say you’d agreed with your daughter that she would do homework from 7pm to 8pm: it’d be nice if you could restrict access to the computer during that time, which this setup can’t manage.
The final tab gives access to logs of computer usage. Again, it’s quite simple: you can see a report of websites visited and blocked, of applications run, and of iChat usage.
A nice feature of these Parental Controls is that you can manage them from another computer. So if your child has his or her own computer, you can keep an eye on things via your home network.
This feature isn’t enabled by default, but you simply need to select the account you want to add this to, and then click on the ‘gear’ icon at the bottom left of the accounts list and select ‘Allow Remote Setup’.
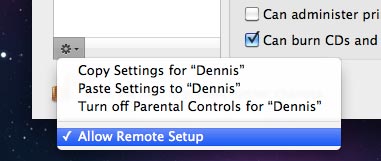
Allow Remote Setup
Going Further with ContentBarrier
So there’s a run-through of what’s immediately available to you in OS X. Now let’s turn to a paid app that gives you a lot more control: Intego’s ContentBarrier. This is a part of their Internet Security Barrier X6. Let me remind you that I wrote about the previous version of this software a few months ago, and said that I had stopped using it. Well, the new version really is an improvement all around. I’m not going to go into whether I’ve changed my overall opinion on whether or not such software is necessary on a Mac, but I am certainly quite impressed by ContentBarrier, so I’ll walk you through the fundamentals of how it works.
Getting started is straightforward, with a clear and simple wizard that leads you through setting restrictions in place. Once you’ve selected the user account you want to modify, you are taken through a series of steps by which you can modify the default settings.
First you can choose from a comprehensive list of topics you want filtered, including violence, hacking, sex and pornography, or sites dealing with jobs (which makes sense when you consider that companies might use ContentBarrier to limit their employees’ internet access).
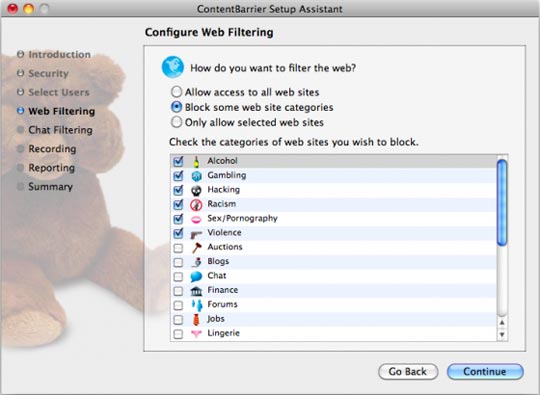
Setting Up ContentBarrier
Next, you can set whether chat software is restricted – and with this app you’re able to apply this setting not only to iChat, but to other chat clients you might have installed on your computer:
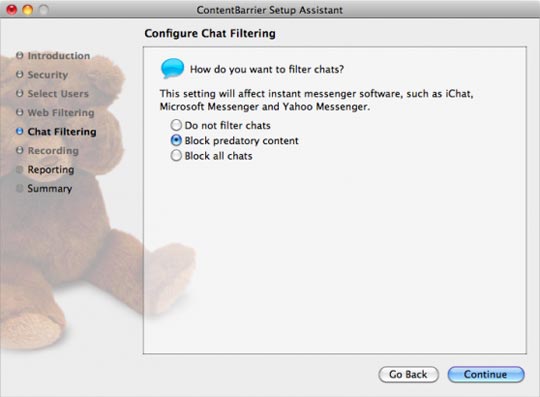
Chat Filtering
And then you come to settings for recording what’s typed and shown on the screen – you can have your Mac take an automatic screenshot every minute. This sounds a bit paranoid, but I imagine it would be a huge help and a relief if you had concerns about some specific website or activity you thought your child might be getting involved with…
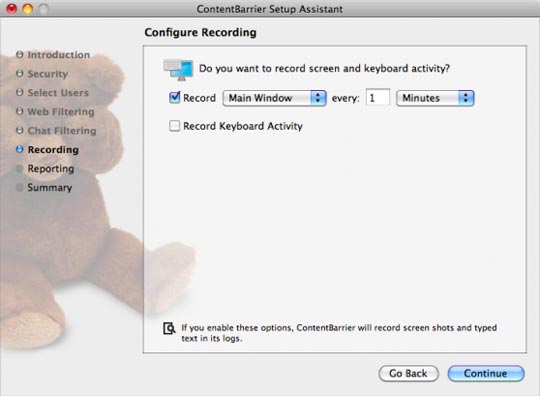
Screen Recording
Next comes reporting and remote control: the options here are much more flexible and powerful than OS X’s native Parental Controls. As well as having different forms of logs emailed to you, you’re even able to set up a Web Administration account that lets you control the settings on this machine from anywhere you have web access. That will be a weight off the mind of a parent who has to travel a lot who’s concerned about what his or her kids are up to.
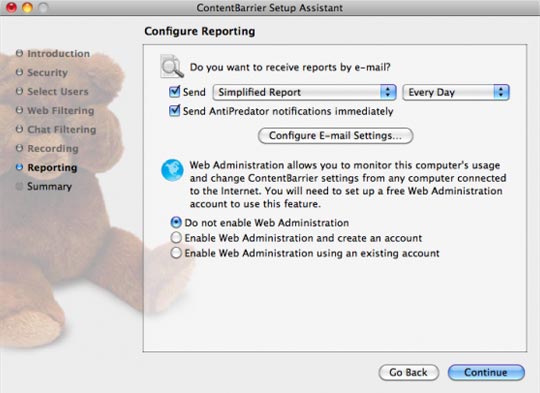
Reporting
Once you’ve worked through the wizard, you’re all set up and ContentBarrier will next take you to the main control window. It’s easy to make sense of, so I won’t say anything more about it:
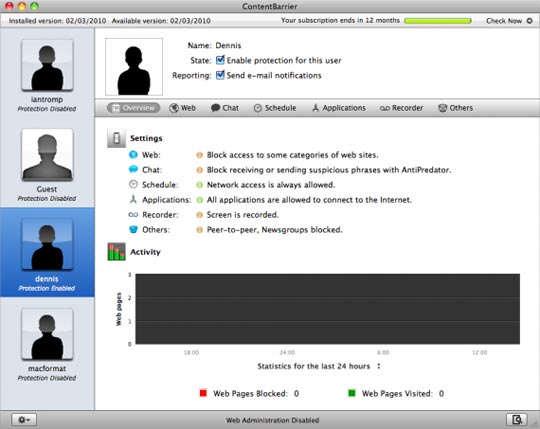
The Main Control Window
What I do want to highlight, though, are details of two of the tabs in this window: the Chat and Schedule settings, which both demonstrate real improvements over the capabilities of OS X.
Firstly, ContentBarrier has what Intego calls AntiPredator capabilities, which allows you to selectively disallow certain phrases or language. As you’ll see from the screenshot, it will stop possibly dangerous questions from transmitting, like: ‘Don’t tell the parent’ or ‘I’m your friend’. You are able to add your own phrases, or choose to let through any of those included in the software.
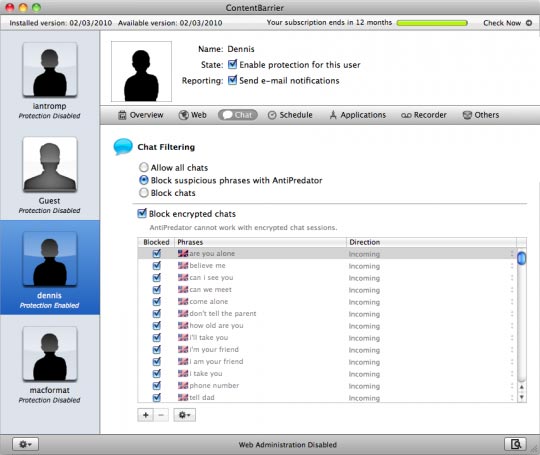
AntiPredator
It’s likely that there will be issues with this type of scanning of communications – probably there are going to be occasional issues flagged in perfectly ordinary communication between your children and their friends. Still, it’s an extra layer of protection, and for many people it might be a relief to know such controls are operating on your Mac.
The scheduling that’s possible with ContentBarrier is powerful and flexible. You can specify network access hours for each day of the week – including making sure that the computer is offline in that hour from 7pm to 8pm you’ve agreed will be for homework.
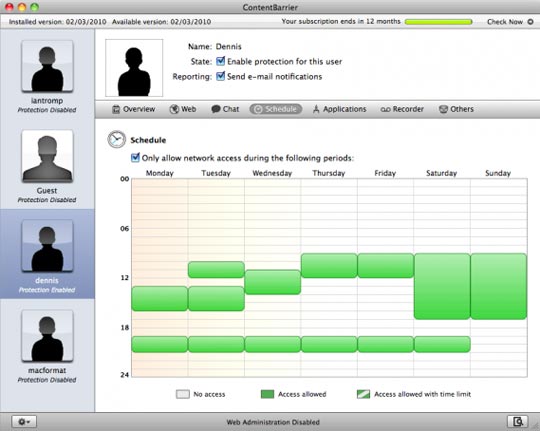
Network Limiting
It seems to me that ContentBarrier is a very good option if you’re looking to control a wide range of aspects of your child’s online experience, and protect them from the dangers that are out there. Combine it with your Mac’s Parental Control settings, and you could come up with an ideal setup that matches your kid’s age, and apply changes as he or she grows older.
A Technical Approach
If it’s only the websites your child is visiting that you’re concerned about – rather than things like the amount of time they’re on the computer, or who they’re chatting with or emailing – another way to protect them is to get right down to the root of your computer’s connection to the internet, by taking control of your DNS settings.
Most of us just accept the DNS that’s served up by our internet service providers; for many, this means that their internet connection is slower than it could be, and for some it can even mean being bombarded by advertising that you would rather not have to see online.
DNS stands for Domain Name System, and it’s the system that translates website names into IP addresses: when your machine tries to connect to a site, it needs an IP address to know where to find it.
There are many options available for DNS lookup; one of the best known is OpenDNS. Basic accounts are free, though upgrading to Deluxe costs just $9.95 for a year and gives you greater control. OpenDNS has been controversial because of the way it routes some queries and adds adverts to search results pages (a quick Google search for OpenDNS controversy will turn up more details). Upgrading to Deluxe was worthwhile for me because it allows me to switch off those troublesome adverts.
Setting up OpenDNS can be a bit daunting, because it involves making some changes to your router. The help files on their website are easy to follow, though, and when I got stuck (my antiquated router wasn’t included in the available help options), Google was, once again, my friend, and led me to some very clear instructions on my ISP’s user forums.
Once you’re all set up, you can login to your OpenDNS Dashboard and set limits on what sites are available for any device accessing the Internet through your router:
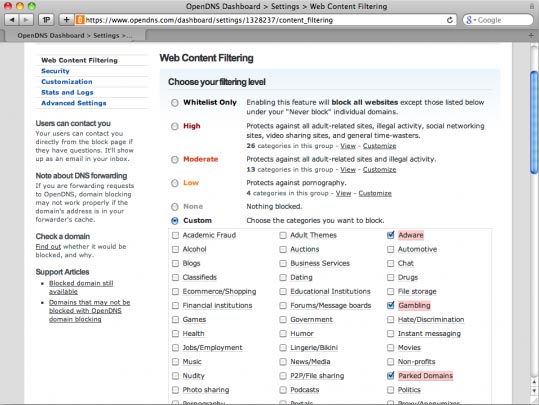
OpenDNS Dashboard
There are even more options available than with ContentBarrier, so you really can set effective limits. You can also add domains manually, which allows you to choose to block any site you’re concerned about. This also allows you to put in place very effective ad-blocking if you’re that way inclined.
The great advantage to managing access controls this way is that these limits will apply to any device using the network: so your kids won’t be able to bypass the settings you’ve put in place on the household Macs by surfing on their iPhones, iPod Touches, or any other mobile device that’s connecting via Wi-Fi.
The problem, for now, is that putting these settings in place means that no-one else in the household can access restricted sites either, though OpenDNS say they are planning to add bypass capabilities to their Deluxe accounts – and have already done so with their (extremely expensive) Enterprise accounts.
In Conclusion
This is a longer-than-usual article, but it’s on a crucial subject – one about which many parents may have serious and realistic concerns. We’re thinking of running a follow-up article soon, which will go into ways that you can make your Mac more child-friendly (kiddy browser anyone?), and some other protections worth applying (iTunes age restrictions and allowances, for instance).
Let us know in the comments if this is a topic you would like to see explored, or if you have any particular concerns when it comes to your kids using a computer!