Create a Cheap Server Using the Regular Snow Leopard Install
Many Mac users were wowed by Apple’s Mac mini server package when it was announced, but at $1,000, it’s still a bit too pricey for even the average person to justify shelling out the cash for a home server. Fear not true believers, we’re going to show you how to turn that old Intel Mac you’ve got lying around into a server that can duplicate many of Snow Leopard Server’s features without shelling out another penny.
What You Need
- Intel Mac
- OS X 10.6 Snow Leopard (We recommend the Snow Leopard Family Pack)
- MAMP (Free)
- OpenFire (Free)
- XCode
- QuickTime Broadcaster (Free)
- Router that supports Port Forwarding (We used the Airport Extreme)
Serving up Web Pages
Mac OS X comes with the Apache web server built in, but if you want to easily have access to MySQL (for databases), PHP (web programming language), or Perl (another programming language), then we suggest you install XAMPP or MAMP, which includes Apache, PHP, Perl, and other tools in a lightweight package that you can install with just one download.
For this tutorial, we’ll install MAMP, but you could choose XAMPP as well. Instructions on how to install each package are available on both sites. Head to the MAMP download page and grab MAMP. We’ll be using the free version of MAMP to set up our web server.
Once the application is downloaded, extract the .dmg file and drag the MAMP folder to your applications folder.
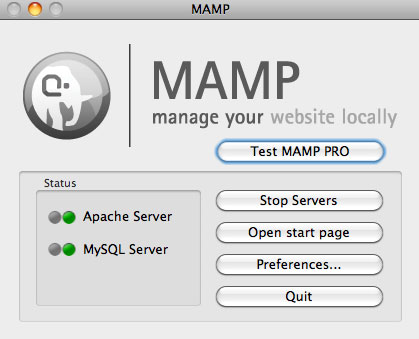
To start the web server navigate to Applications > MAMP and launch the MAMP application.
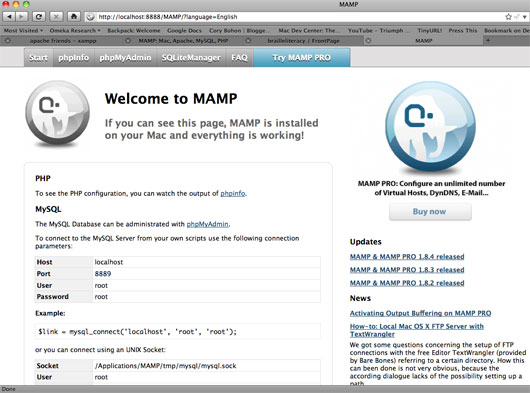
After you’ve launched MAMP, click on the Open Start Page button. You’ll then be presented with a page that tells you the MySQL username/password/port number, and gives you access to tools like phpMyAdmin and SQLiteManager. You also have access to a phpInfo page that can tell you more about the version of PHP that is installed. You can then create MySQL databases for CMS installs (i.e. Wordpress, Drupal, Joomla, etc.).
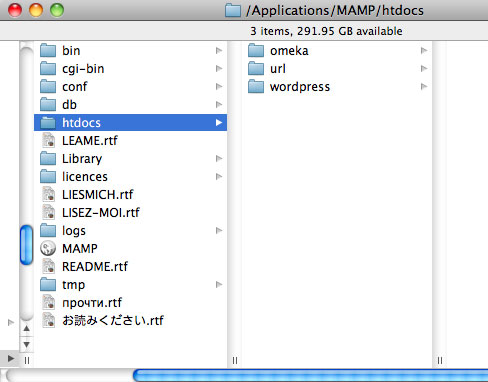
Any websites you create need to be stored in the Applications/MAMP/htdocs folder. You can look at the pages stored there by opening your browser of choice and navigating to the URL localhost:8888 (the default address and port for accessing the MAMP web server).
For more about MAMP, you can consult the documentation on their website.
Setup FTP Access to Your Server
FTP (File Transfer Protocol) will allow you to login to your Mac via your local network or across the Internet (see DynDNS below) to transfer files to and from your Mac. Mac OS X comes with a built-in FTP Server.
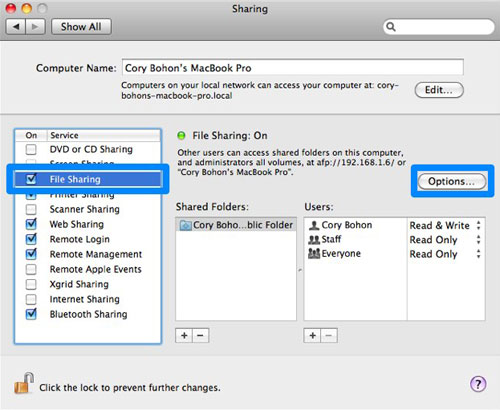
To start and configure the FTP Server, open System Preferences and click Sharing. Check the box next to File Sharing and then select Options.
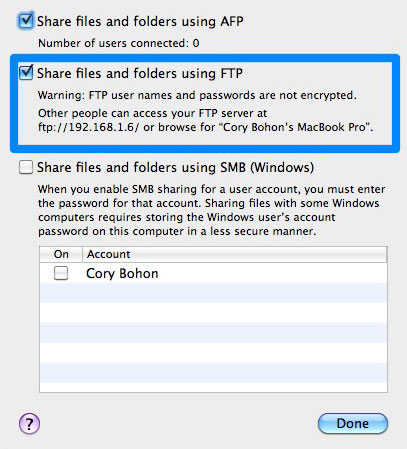
A popup window will give you more options. Select the Share files and folders using FTP checkbox. After you check the box, your local IP address will be shown to you.
![]()
You can use this address along with your Mac OS X username and password to login via your favorite FTP client (we recommend Transmit). You can login using either your long OS X name (i.e. “Cory Bohon”) or your short name (i.e. “Cory”). Once logged in, you can upload or download any files you wish.
Setting up a Jabber Chat Server
A Jabber server will allow you to chat just like AIM, but you’ll be routing through your own secure server and connection. To create our very own Jabber Server, we’ll be using the open-source application Openfire Server.
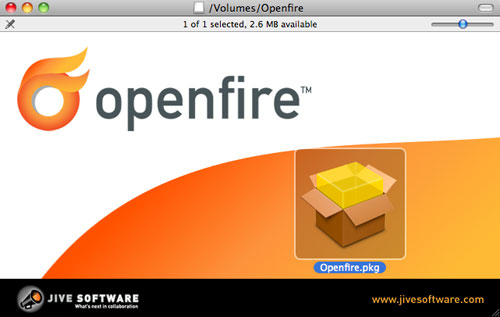
You can download this server for free from the Openfire website. When you install the application, it will install a preference pane that’s accessible from within System Preferences.
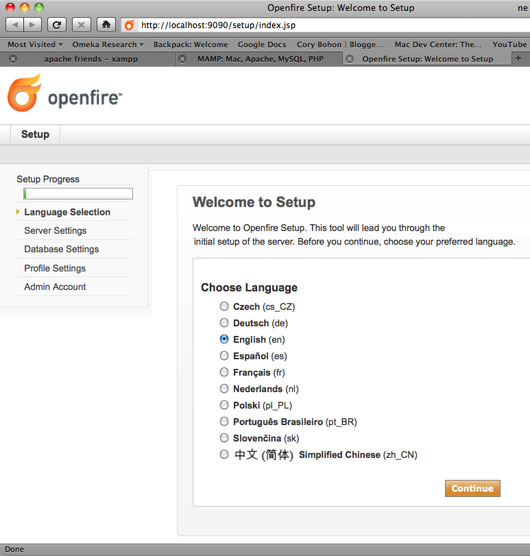
To configure the initial settings for the server, open System Preferences and click Openfire. Once there, click the Open Admin Console button. This will launch a webpage that will prompt you to select your language; do this and click Continue.
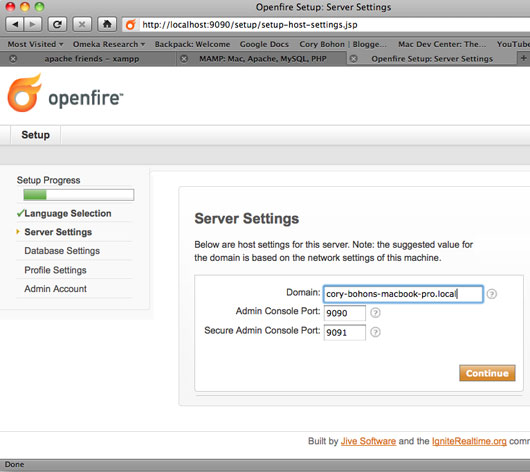
The next screen will prompt you to specify the server settings for Openfire. If you are running on a local network, the default domain will work. If you want to make the Jabber server open to the Internet, you’ll need to change this later once you setup DynDNS (in a later step). You won’t need to change the Admin Console Port or Secure Admin Console Port, so click Continue. Remember to make note of the Domain you’re using, as you’ll need this information later.
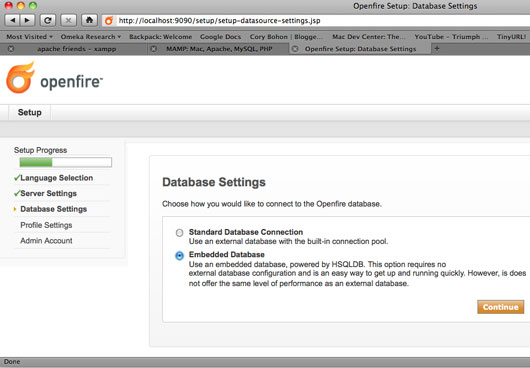
On the next screen, you’ll be asked to specify your database settings for Openfire. For this how-to, we’ll use the Embedded Database option as it will provide a faster setup for Jabber; however, if you plan to setup a large Jabber network, you’ll want to select Standard Database Connection and be prepared to input settings for an external database connection (It will accept MySQL). Click Continue.
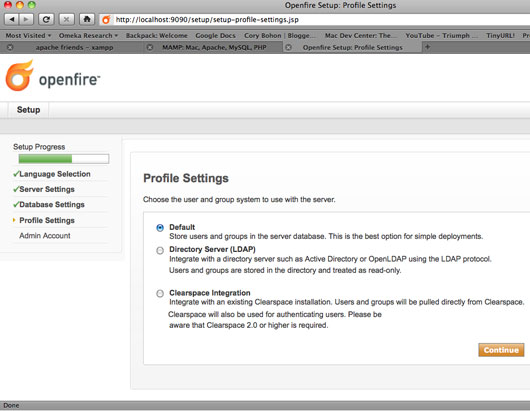
On the next screen, you’ll set up the profile settings. Select Default for the simplest setup and click Continue. If you know what you’re doing you could setup LDAP or Clearspace Integration.
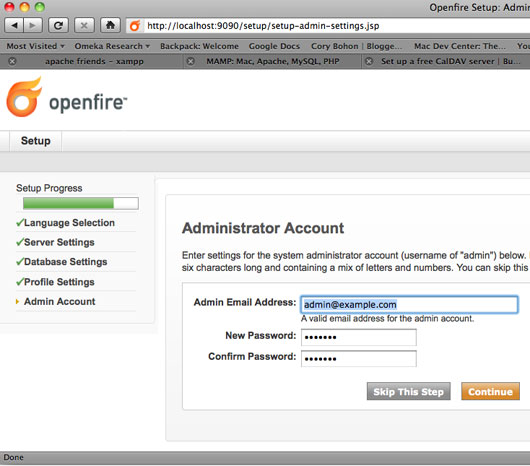
The next screen asks you to provide details for an administrator account. Enter you email address, username, and password. If you choose to skip this step, the default username and password combination will be "admin" / "admin." Click Continue.
Note: The admin user name will still be "admin" after you create a new password and input an email address.
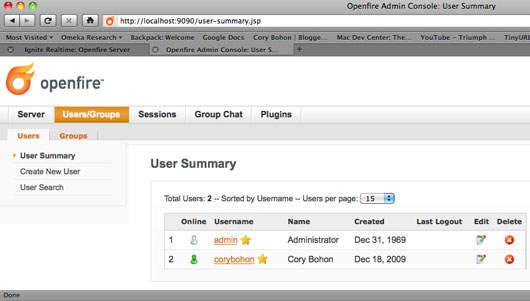
You’ve now setup your Jabber server. As soon as you log in to the console, you can add and manage users for your Jabber chat system. If you didn’t change the ports for the console, you can always login to the console by opening your favorite web browser and go to http://localhost:9090
Let’s set up the accounts in iChat so you can get chatting on your local network!
Open iChat and open the preferences by going to iChat > Preferences. Click the Accounts tab and then select the plus sign (+) at the bottom of the window.
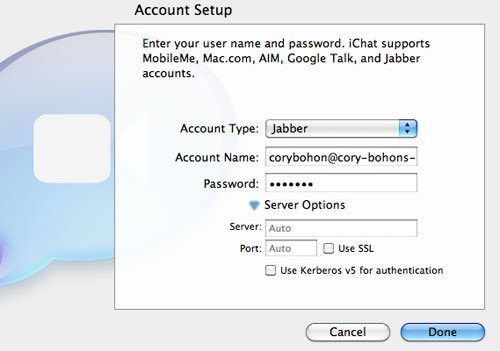
In the Account Type drop-down menu, select Jabber. Under Account Name, fill out your username followed by an @ and the domain that you entered (or that was entered for you) during setup. Type in your password in the next field.
Click the triangle next to Server Options and make sure Server and Port both say "Auto" (nothing entered in those fields), and ensure that the Use SSL and User Kerberos v5 for authentication boxes are both unchecked, then click Done.
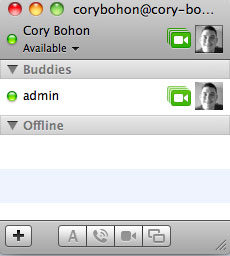
After a few seconds, depending on whether or not your Mac is connected to the Internet, iChat will connect to the server and authenticate you as a user. You’ll then see a new buddy list popup, allowing you to add friends using the same username@domain naming scheme.
Setting up a VPN (Virtual Private Network) Server
A simple VPN (or Virtual Private Network) lets you setup a computer at a physical location (say your house or company) and allows you to login from your remote Mac/PC/iPhone and use resources from that physical location (i.e. Internet access). This type of connection adds a layer of security to your remote devices, since they won’t be using the Wi-Fi hotspot or a 3G connection to browse the Internet, but rather, routing the traffic through your physical location’s Internet access remotely and securely.
Setting up a VPN on your old Mac server is easy to do and can provide you additional security for remote devices like your iPhone.
TinyApps.org has a simple and easy to use VPN Server application for your Mac. You can download and install it using the instructions on their website. Their website also include details on how to setup the VPN access on your iPhone, PC, or Mac.
Setup a free CalDAV Server
A CalDAV server gives you Microsoft Exchange-like features using free, open source software that Apple provides via the free Apple Darwin Calendar Server (DCS). The DCS keeps you in sync with your calendars through iCal. You need to have the Apple Developer Tools installed on your Mac (Install XCode, available on the Snow Leopard Install Disk in the "Optional Installs" folder.), and posess some knowledge of the Mac OS X command line interface.
After you install the Developer Tools, open Terminal (found in Applications > Utilities) and type in each of the following commands followed by enter:
svn checkout http://svn.calendarserver.org/repository/calendarserver/CalendarServer/trunk /CalendarServer
This command will download the files from Apple’s project website and store them on your local machine. Next, type in the following commands followed by enter:
cd /CalendarServer
./run –s
Run the following commands to create a file we need and remove one that we don’t:
cp ./conf/caldavd-test.plist ./conf/caldavd-dev.plist
rm ./conf/caldavd.plist
Now, you’ll need to add the user information. For this part, you’ll need to open a Finder window and navigate to your local hard drive then to /CalendarServer/conf/auth/. Once there, locate the accounts.xml file. This is where all of the user accounts information is stored. Right-click on that file and select Open With > TextEdit. You should now see the file opened inside of TextEdit. You can leave the included users in, or remove them at your discretion.
To add a new user to the file, copy/paste the following bit of code and enter the appropriate information for the user you’re adding:
<user>
    <uid>shortname</uid>
    <guid>shortname</guid>
    <password>password</password>
    <name>Full Name</name>
    <cuaddr>mailto:[email protected]</cuaddr>
</user>
Make sure that this information is entered between the opening <accounts realm="Test Realm"> tag and the closing </accounts> tag. Save the file when you’ve finished adding users.
Next, locate the file caldavd-test.plist in /CalendarServer/conf/ and open it with TextEdit the same way you did the previous file.
Locate the text "<string>localhost</string>" under the key "ServerHostName." Change the text from "localhost" to your computer’s local IP Address. If you dont’ have a static IP Address, skip down to the section on "Getting Your Server Online," set up your computer’s manually configured IP Address, then come back here and type it in.
You’ll need to determine if you want to have encrypted or unencrypted access to. First, find the section of the file that contains the following lines:
<!-- HTTP port [0 = disable HTTP] -->
<key>HTTPPort</key>
<integer>8008</integer>
<!-- SSL port [0 = disable HTTPS] -->
<key>SSLPort</key>
<integer>8443</integer>
If you want unencrypted access, replace 8443 with a 0 in the second section; for encrypted access, replace 8008 with a 0 in the top section.
Next, locate the key BindAddresses, then underneath it, locate the line that says "<string>127.0.0.1</string>." Leave this line alone, but create a second line that is identical, but contains the computers acutal static IP Address instead of the localhost address of 127.0.0.1. Save the file and then close out of TextEdit.
Return to Terminal and type in the following commands:
./run -d
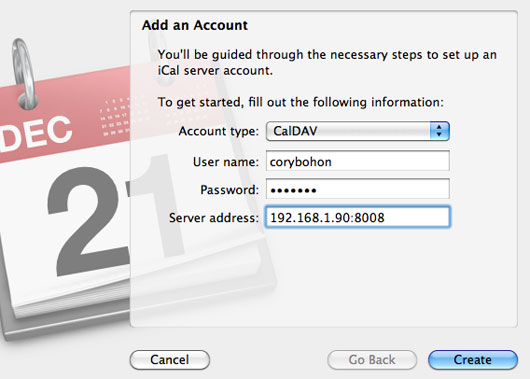
Your CalDAV server is now up and running. You can connect to it in iCal by going to Preferences > Accounts > Add. Select CalDAV from the drop-down menu, type in your username/password/IP Address of the server and click Create. Remember that the IP Address should be XXX.XXX.X.XX:8008 if it’s unencrypted or XXX.XXX.X.XX:8443 if it’s encrypted.
You’ll need to enter the
./run -d
command each time the machine starts to start the CalDAV server.
Getting Your Server Online
You now have a fully functioning server that acts as an FTP server, Jabber chat, VPN, and CalDAV. That’s quite a feat, especially considering that you’ve got all of this for free on your Mac. Your server is fully functional on your LAN (local area network) using your IP Address to access the services, but if you want to have external access via the Internet, you’ll need to set up and configure a DNS solution.
We recommend using DynDNS, a free and easy to use service that will provide a simple DNS solution and domain name. This service gives you a domain name (i.e. “myname.dyndns.org”) that you can navigate to with your web browser to access your Mac server without having to remember your ISP assigned IP Address (i.e. XX.XX.XXX.138).
To get DynDNS setup you’ll also need a router that supports Port Forwarding. You can do this on most modern wireless and wired routers. We’ll be using an Airport Extreme Base Station. For instructions on how to do this on other routers, give PortForward.com a try.
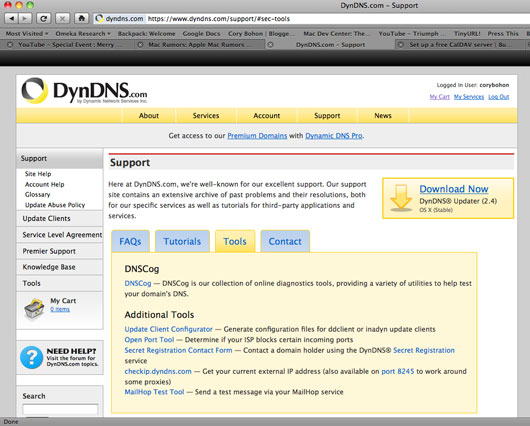
First things first, setup an account on DynDNS. Once you’ve created your free account and are logged into DynDNS, click Services at the top of the page, and then click Dynamic DNS.
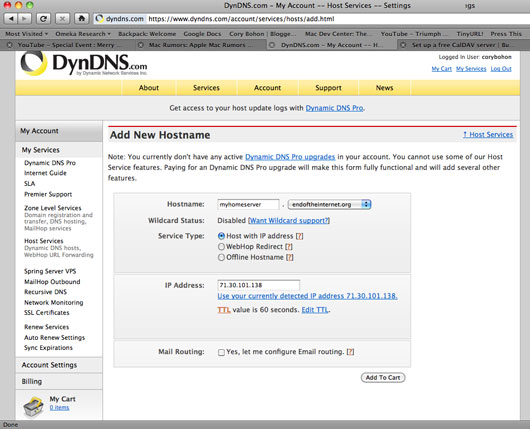
Once there, click Dynamic DNS Free. Click the Get Started button, then fill in the hostname you’d like. We’re choosing "myhomeserver," then use the drop-down box to select the post-fix of the address.
In this instance, we chose "myhomeserver.endoftheinternet.org." This will be the address we will enter into our browser to access the home server. Under Service Type make sure Host with IP address is selected, click Use your currently detected IP address under the IP Address section, then click Add to Cart.
Don’t let this fool you, it’s completely free. Once you enter the shopping cart, click next, then Activate Services. Your domain name is now activated, but there’s still more to configure.
Unless you have a static IP address with your ISP, you’ll need to download the DynDNS Updater for Mac to ensure DynDNS is always updated with your new iP address. Open the DMG and drag the DynDNS app to the Applications Folder on your Mac. Once installed, launch the application.
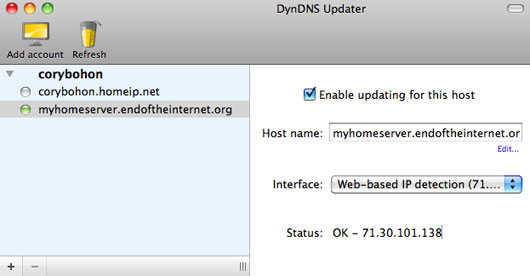
When the app launches, enter in your login information. Your available domain names appear, select the one you just created, then click "Enable updating for this host." If everything goes well, you’ll see a green dot appear next to the host name under your account on the left side of the window. You’ve now configured DynDNS to translate your domain name into the IP Address for your home Internet access.
Before you begin configuring the router, we need to make sure the Mac you’re using has a static IP Address that won’t change like a dynamic address does. Navigate to System Preferences > Network.
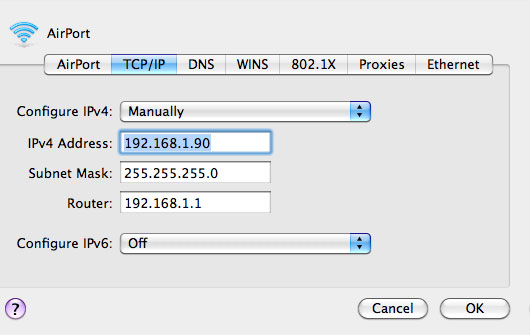
If you’re using a wireless click AirPort, click Advanced. Click TCP/IP, then the Configure IPv4 drop-down box and select Manually. This will allow you to specify a manual IP Address that’s static.
In the IPv4 address field, type in an address like 192.168.1.90 and click OK and then click Apply. This will be the Mac’s static IP Address on the LAN.
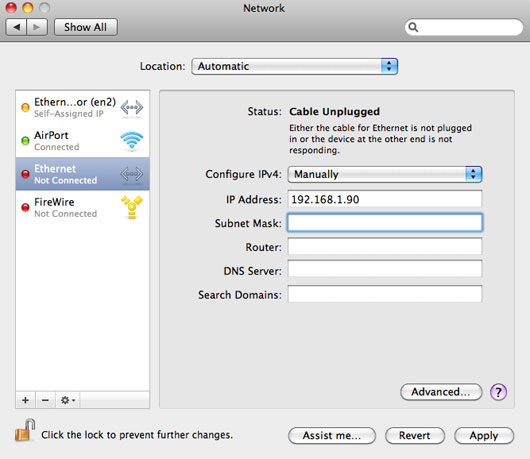
If you’re using an Ethernet connection for your router, click Ethernet and change the drop-down Configure IPv4 option to Manually. In the IPv4 Address type in an address like 192.168.1.90 and click Apply.
Now it’s time to prepare your router
If you’re using an Airport Extreme, launch the Airport Utility on your Mac and utilize the following directions. If you’re using a router from a different manufacturer, try PortForward.com for tutorials on your particular router make/model.
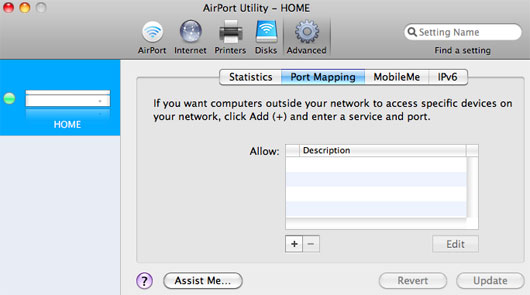
Once you have the Airport Utility opened, click Manual Setup, then click Advanced > Port Mapping. This is where you will be able to setup where incoming traffic for a particular port is routed to.
Now, it’s time to set up the Web, FTP, and Jabber servers to work with the domain name service from DynDNS. Click the plus button (+) at the bottom of the window.
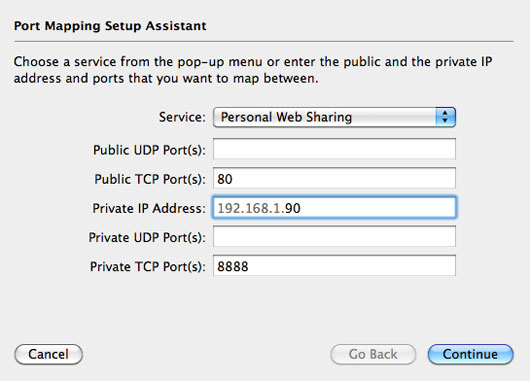
Under Service, choose Personal Web Sharing. Change the Private TCP Port to 8888 and make sure the Public TCP Port is 80. Port 8888 is the default port for MAMP, if you’ve changed it, you’ll need to put in the appropriate port number. Add the IP address you created for your Mac server to the Private IP Address Field. Click Continue and Done.
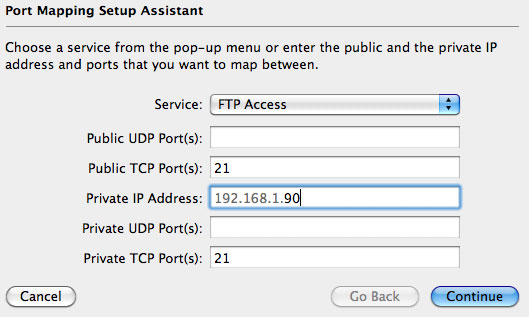
To set up FTP, click the plus button (+) again, choose FTP Access from the drop-down menu and add the IP address you created for your Mac server to the Private IP Address Field. Click Continue and Done. Your FTP is now configured.
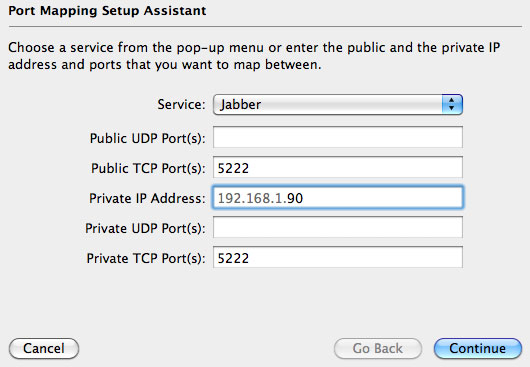
To set up Jabber, click the plus button (+) again, select Jabber from the drop-down menu, and add the IP address you created for your Mac server to the Private IP Address Field. Click Continue and Done.
You should now see all of your configured services in the Airport Utility. To Save the settings, click the Update button in Airport Utility. The router will then restart and the settings will take effect.
You can now access your web server from anywhere in the world by firing up your web browser and typing in your DynDNS Address (i.e. myhomeserver.endoftheinternet.org). Assuming you’ve configured everything correctly, your webpage will load from your newly built Mac home server. You can also use this address to access files from your favorite FTP client, and Jabber from iChat (just change your host name in Openfire). Remember that your Mac must remain on for you to have access to the services that it now provides.
So, there you have it, how to breathe life into your old Mac and make something useful.