How To Make your Mac a Web Server
You may think you are one with the Interwebs, but until you actually create a website, you are merely part of the Interwebs. Follow this tutorial, and you will learn how to become one in about a billion, the exclusive club of people who host sites of some sort.
Hosting an HTTP server used to be an arduous task, but Mac OS X makes it easier than ever. We recognize that there is a built-in Web Sharing feature that allows you to create a server with one click, but we will teach you how to make a more advanced server that can handle server-side scripting languages like PHP.
What You Need:
- MAMP (free, www.mamp.info)
- A DynDns account (free, www.dyndns.com)
- Access to your router to forward ports (in other words, a home network you control)
- A Mac that’s on and connected to the Internet all the time (in other words, if you try this with a laptop, your site will be down whenever you laptop is off or disconnected)
- Optional: a CMS like Drupal (free, drupal.org) or Wordpress (free, www.wordpress.org)
1. Install MAMP
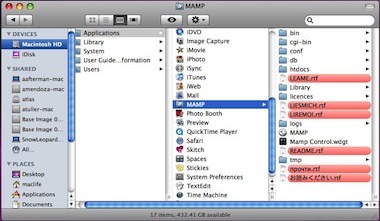
MAMP (an acronym for Mac, Apache, MySQL, PHP) is an open-source platform for hosting a website on a Mac. Download the MAMP disk image, open it, and drag the MAMP folder to the Applications folder to install it. Then, browse to the /Applications/MAMP folder. You should see something akin to what is in this screenshot.

We like saying the word MAMP repeatedly. It’s a fun word.
This is the control center for your entire installation. Any websites you create will go here, and all the configuration files for your server will go here as well.
2. Configure MAMP
First, open the MAMP.app file in the /Applications/MAMP folder. This will start the HTTP server. Then, click Preferences. The first thing you need to do is deselect "Stop Servers when quitting MAMP" and "Check for MAMP PRO when starting MAMP." This way, you don’t have to keep the application running all the time to keep the servers on.

Try it: "MAMP, MAMP, MAMP." It’s just fun to say.
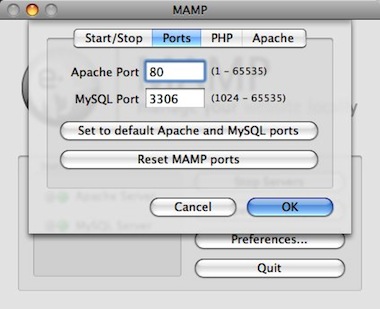
Next, go to the Ports tab, and click the button that says, "Set to default Apache and MySQL ports." Sticking to standards is always best, because if you leave it as port 8888, for example, your URL will be something like www.example .com:8888, which is annoying.
3. Sharing is Caring
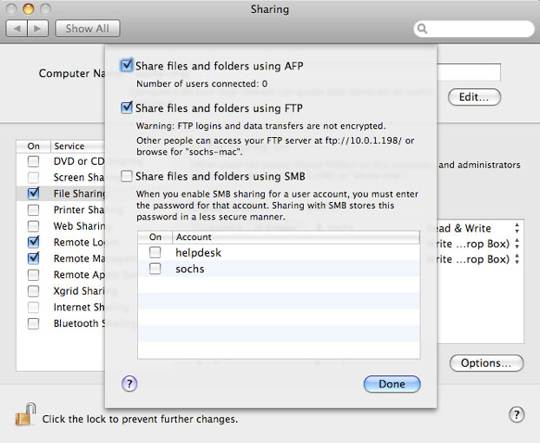
Now, go to System Preferences, and click the Sharing tab. Check File Sharing, but then click the Options button. Make sure "Share files and folders using FTP" is selected. FTP is generally considered the standard for editing websites remotely, and if you plan to use a tool like Dreamweaver or Coda to edit the HTML code, they use FTP (and its more secure sibling, SFTP) to manage sites. Click Done.

Next, make sure Web Sharing is deselected. If it’s selected, the Apache server that comes with your Mac will conflict with the one that MAMP has just installed. Finally, you should check the box for Remote Login, because controlling your computer with SSH is the easiest way to restart the server remotely
4. Go for Ports, not Starboard
If you plan on accessing your website outside of the computer that is hosting it, and you have a router or firewall, you will need to forward the ports for HTTP to your computer. The way to do this is different for each router, but the basic process is the same. First, go to System Preferences > Network. Write down the local IP address that is shown.

Find the local IP address under Status, and write it down.
Then, go to Port Forward (www.portforward.com), scroll down, and click on your model of router. On the next page, atop the giant list of services, you’ll see your external IP (different from your local IP), and write that down too. Find Apache is the list of services and click it. On the next page, enter your local IP address as noted earlier, and follow the resulting instructions to forward the proper ports on your router.