Build The Ultimate Mac Entertainment Center
Wishing you could cut your ties to the cable company forever? You can. You can broaden your video entertainment choices and spend less each month with an Apple tech-based home-media setup. We show you exactly how.
There are a few ways to make Apple tech the centerpiece of your entertainment center, but if you want to go all out like we did, you’ll need the following:
- Apple TV or dedicated Mac (Intel processor recommended but not required)
- High-speed Internet connection and wireless home network
- High-definition television or large flat-panel monitor capable of at least 280x720 resolution (720p) and 16:9 aspect ratio
- Latest version of iTunes on your primary Mac (8.2 as of press time)
- Digital A/V cables necessary to connect existing entertainment center components to your Apple TV or Mac (see below)
- Netflix account for streaming movies on demand via a compatible device (such as Roku, Xbox 360, or TiVo)
- Amazon.com log-in and Amazon’s free UnBox software for downloading video from Amazon Video on Demand
Considering our lack of free time to watch TV, our cable bills are embarrassingly high, ranging from $60 a month to a talk-about-it-only-in-hushed-tones $130. Sure, the top-priced package has nearly every channel, including dozens in HD, but even at 60 bucks, we’re paying for much more than we watch. Who has time to soak in the content offered on 300 channels? We don’t. But at least now there’s a way to only pay for the programs we actually watch.
It’s time to cut the cord to the cable company and get all of your favorite video programming from the Intertubes, served up on your Mac or an Apple TV. Between a wealth of free, streamed content and á la carte paid shows from iTunes and elsewhere, you can easily undercut what you’re paying for cable or satellite TV service each month. (If you need proof, see our cost comparison chart at the end of this article.)
NBC, Fox, CBS, ABC, the WB, Comedy Central, and many more networks stream shows for free on their own sites and Hulu or other services. And you’ll find many more shows and movies for sale or rent in the iTunes store and on Amazon. And, of course, if there’s still a show you’re missing, you can get nearly anything else through Netflix DVD rentals or real-time streaming.

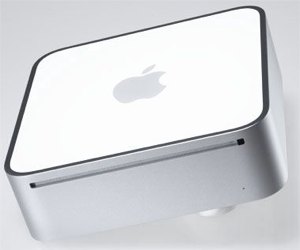
Online content is cheaper in the long run, but it comes with a few trade-offs. For one thing, we’re not about to move a couch in front of our office computer, so we moved some Apple gear—we recommend using a Mac mini or Apple TV—into our entertainment room instead. And visual quality, especially that of free content, still has room for improvement. At press time, even if a show is marked “HD,” it might render at a lower quality than your cable TV feed, although some HD-labeled content is nearly the same.
In the following pages, we’ll explain how to navigate these pitfalls and get set up. With this guide, we’ll help you decide if an Apple TV, Mac mini, or other option should be your entertainment-system centerpiece and show you how to hook your choice up to your existing TV and sound system. We’ll detail the different methods you can use to access your favorite shows—even with an over-the-air tuner—and explain which peripherals offer you the best control from the comfort of your couch.
So grab your most recent cable bill and—before you shred it—schedule an appointment to cancel your service for good. You’ll get the shows you want when you want them, and you’ll even save money. And as Internet speeds and compression technologies improve, your Apple-centric media center is only going to get better.
Video, Audio, and Network Basics
The first step toward becoming cable-independent is to make sure you already have the basic framework in which to insert your Apple TV or Mac mini.
Unless you just came into a cache of cash, you’ll probably want to keep your TV and audio setup as it is, so you can realize the most savings from giving your cable service the KO. In most cases, the television and audio receiver you already own should work fine with the data cables from an Apple TV or Mac mini. But if you’re upgrading or setting up an Apple-centric system from scratch, look for equipment with the following features.
Your existing HDTV will essentially function as a computer display. In fact, you can even use a large flat-screen monitor as your TV in most cases. Regardless of what type of display you’re using, pay special attention to its aspect ratio, screen resolution, and inputs. Most HDTV content is formatted at a 16:9 aspect ratio, meaning that for every 16 inches it is wide, it’s 9 inches tall. Nearly every HDTV ships at that aspect ratio. Many computer displays are the same shape, though occasionally they come in 16:10 or other ratios. For the best results, stick with a traditional 16:9 screen.
Screen resolution is also crucial, whether you’re picking an HDTV or computer display. Get a screen capable of displaying at least 720p HD video, meaning it is equal to or greater than 1280x720 pixels. Pick a resolution of 1920x1080 pixels—also known as 1080p—for best results. We like LCDs for their size, quality, and cost. But you could pick a projector or another style of screen, if you prefer.
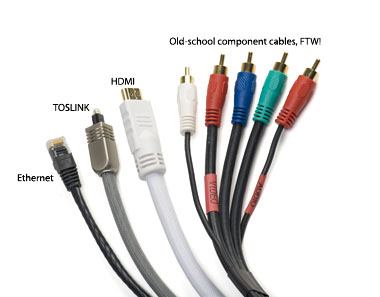
Choose a TV or computer display with digital inputs too. You absolutely need DVI, HDMI, or one of their close cousins, such as mini-DVI or Mini DisplayPort. These connectors are capable of carrying HDCP (high-bandwidth digital content protection), the latest copy-protection scheme. Those ports and HDCP are on nearly every new HDTV.

Having the right connectors is key to reaching entertainment nirvana.
If you use a digital connection without HDCP, some content, including HD iTunes video, won’t play at all. So be sure every digital device you connect supports it, including any switchbox that you’d use to connect several inputs, such as a PS3 and Apple TV, into one TV port.
If your older TV doesn’t support HDCP, a component connection can still carry a high-resolution picture. (Look for the three RCA cable jacks coded red, blue, and green.) HD iTunes shows will play through that hookup.
Now Hear This. Audio makes up the other half of your TV- and movie-watching experience. If you don’t want to use a dedicated audio receiver, you’ll still be able to connect to your TV’s built-in speakers with RCA cables. But we highly recommend standalone audio hardware, even if you end up buying a stereo receiver bundled with speakers. (If you’re using a Mac mini, you will need to use a stereo mini-to-RCA adapter for audio, available for a few bucks at Radio Shack or on Monoprice.com.)
Your stereo receiver should feature a TOSLINK (also known as Optical Cable) input with Dolby Digital 5.1 surround sound support. If you’re a movie buff or audiophile, you may have already upgraded beyond this standard and may consider it the lowest bar to clear, audiowise. But the five speakers plus subwoofer on such a system sound great, and none of the streaming solutions we describe in this article has expanded beyond that standard.

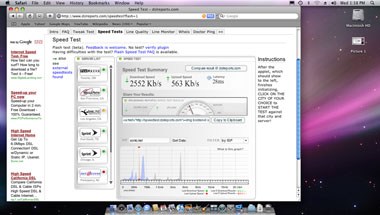
Our Internet service isn’t scoring as high as normal. If this persists, we’ll have to call the ISP and complain about speeds.
Check your Network. Your cable-free home theater also needs a good network connection, teamed with a fast broadband Internet feed. Go for service at about 6Mb/s or faster. Visit www.broadbandreports.com to shop for local service and also test your setup to see if you’re getting that much speed. (If those tests don’t fall within the promised speed range for which you pay, contact your ISP.)